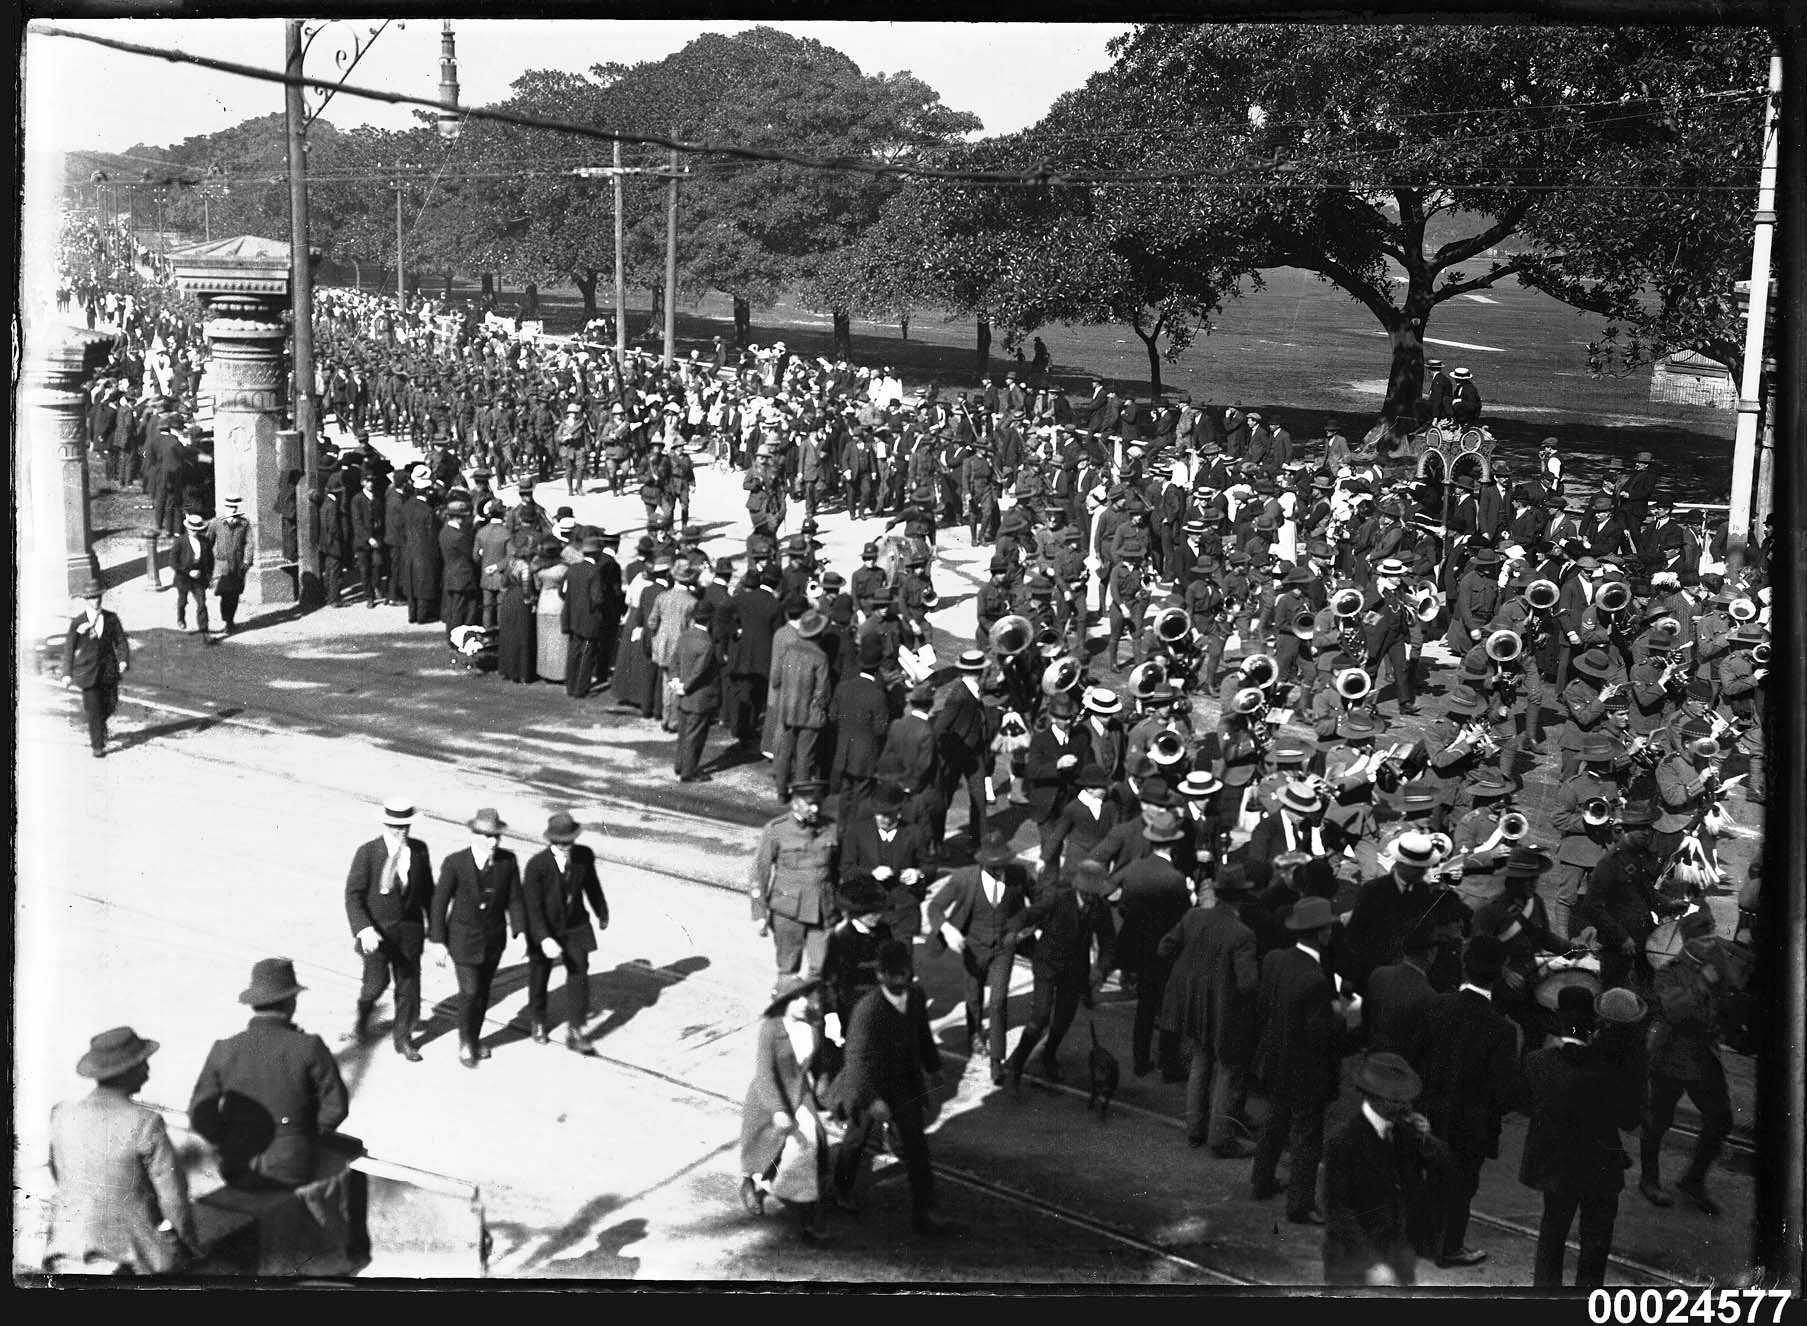
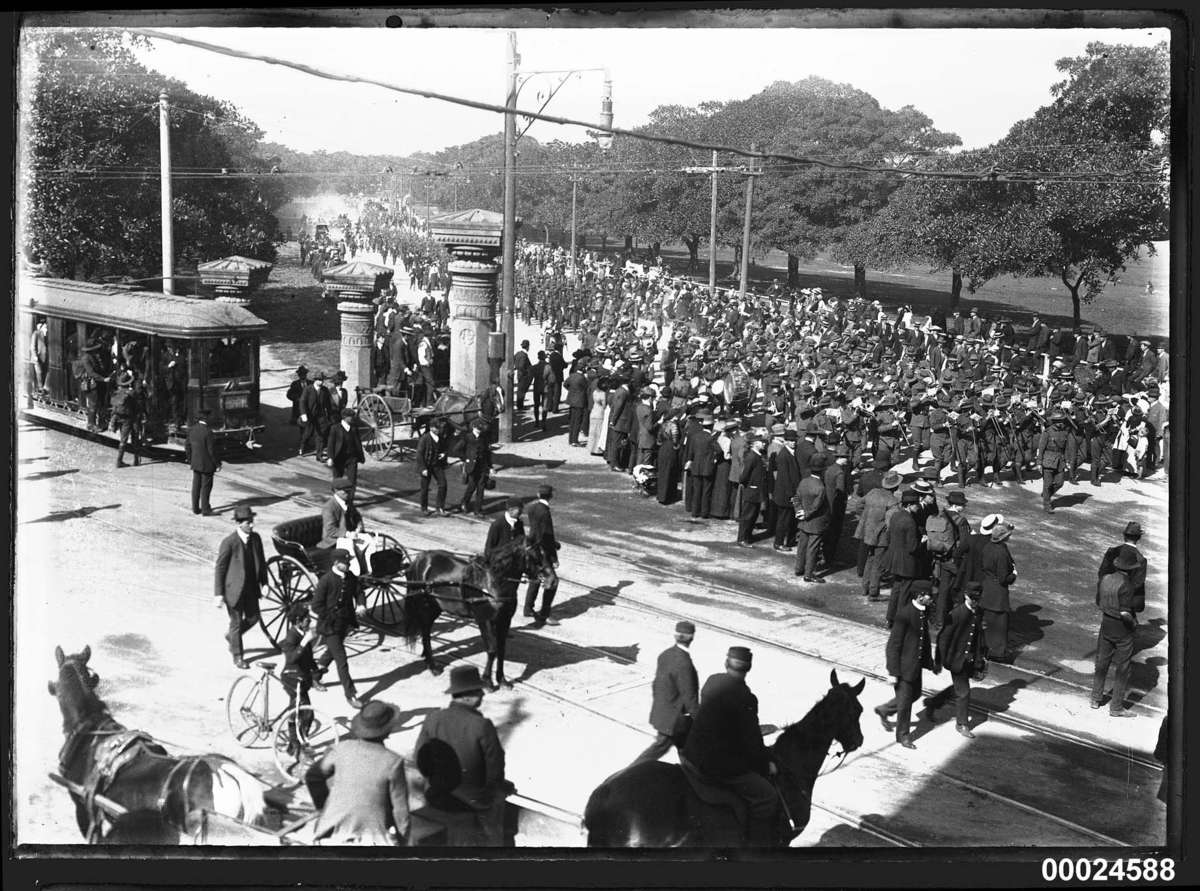
Contingent of the Australian Naval and Military Expeditionary Force, marching on Randwick Road, 18 August 1914.
Photographer: Samuel J Hood Studio, ANMM Collection
On this day, 100 years ago, a contingent of the Australian Naval and Military Expeditionary Force (ANMEF) marched through Sydney for final embarkation. Fourteen days after Britain declared war on Germany, the ANMEF contingent made their way through streets flooded with tens of thousands of well-wishers. It would be the start of many marches to come throughout the war, and one of the many photographer Samuel J Hood captured with his Folmer and Schwing Graflex camera. Yesterday, a service was held at Government House and re-enactment of the march took place. As Royal Australian Navy (RAN) cadets marched down a soggy Macquarie Street, they paid homage to the ‘khaki clad contingent’ who had taken the same steps a century before under a clear blue sky.
The ANMEF was a small volunteer force which, according to John Perryman, comprised eight companies of infantry, 500 naval reservists and time-expired Royal Navy seamen drawn from Queensland, New South Wales, Victoria and South Australia. Their mission was to seize and destroy German wireless stations in German New Guinea.

Contingent of the Australian Naval and Military Expeditionary Force, marching on Randwick Road, 18 August 1914.
Photographer: Samuel J Hood Studio, ANMM Collection
True to its dramatic style of reporting, The Sydney Morning Herald gave its account of the day, beginning with: ‘The Empire is engaged in the greatest struggle in its history.’ That morning, before the contingent left camp in Moore Park, State Commandant Colonel Wallack reportedly addressed the men, he was ‘sure they would do their duty nobly and return to Australia with honour’. People crowded the streets cheering as the ‘khaki column’, led by military bands, marched along Randwick Road (now known as Anzac Parade), Oxford Street, College Street passed St Mary’s Cathedral, up Macquarie Street and finally to Fort Macquarie, where the Sydney Opera House now stands.
As with many of the marches to come, newspapers vividly described how ‘every window and balcony was packed with sightseers, waving flags and kerchiefs’, cheers and music filled the air, miniature Union Jacks and Australian flags were stuck in rifle barrels and ‘gleaming bayonets’ shone in the sun as the bands played ‘Advance Australia Fair’. Hood’s photographs were published in Melbourne’s The Australasian, with one even featuring some old fashioned doctoring!


As the troops boarded ferries leaving their loved ones ‘weeping on the shore’, the Governor Sir Gerald Strickland arrived at the scene as the crowd of 30,000 strong began singing ‘God Save the King’. Waving and whistling to those left ashore, the men of the ANMEF departed the Fort for Cockatoo Island where troopship HMAT Berrima was docked.
HMAT Berrima departed Sydney the following afternoon, 19 August 1914, and the troops returned on 16 January 1915. Hood was again present to capture their disembarkation at Circular Quay, five months after their grand departure. Though their mission in German New Guinea was Britain’s first successful military campaign of the war, it also signalled Australia’s first casualties (six died, four injured) in what was to become the country’s bloodiest conflict. In addition to the men killed and injured during the mission, the loss of Australia’s first submarine HMAS AE1 and 35 crew on 14 September further tarnished the German New Guinea campaign and marked the RAN’s first major tragedy.
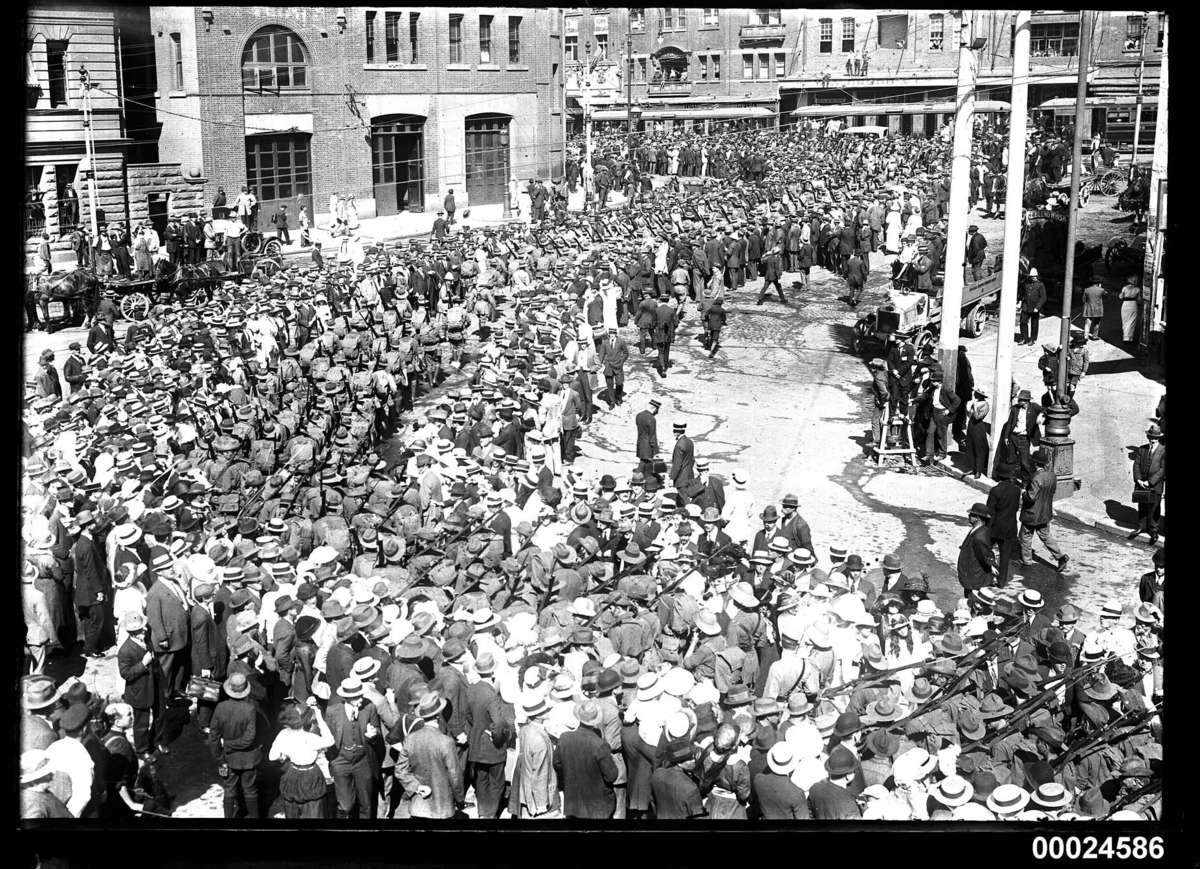
Returning troops of the Australian Naval and Military Expeditionary Force marching from disembarkation at Circular Quay on their way to Victoria Barracks in Paddington, Sydney on 16 January 1915.
Photographer: Samuel J Hood Studio, ANMM Collection
See the full series of World War I marching photographs from the museum’s Samuel J Hood collection via the museum’s Flickr Commons photostream.
Follow wireless radio operator John Brown on Twitter as shares his diary account of the highs and lows of life in the RAN 1914-1918.
Nicole Cama
Digital Curator
Special thanks to the Flickr Commons super sleuths, in particular quasymody and beachcomberaustralia, for their efforts in researching these historic photographs.
Further reading:
- John Perryman, ‘The Australian Naval and Military Expeditionary Force – First to Fight, 1914’ via Royal Australian Navy
- Our Troops March through the City. (1914, August 19). The Sydney Morning Herald (NSW : 1842 – 1954), p. 12.
- New South Wales Troops Marching Through Sydney. (1914, August 29). The Australasian (Melbourne, Vic. : 1864 – 1946), p. 59.