
Star light, star bright, first constellation I see tonight…
There’s almost no end to the fun that can be had when kids have torches in their hands. Shadow play, bedroom projections, reading under the covers after lights out, spooky face stories, or… a handheld miniature planetarium.
This mini-planetarium is perfect for projecting under the covers, onto bedroom walls or with evening story time. More than just a toy, it’s also a great way to learn to identify constellations in the night sky.
And it could also be a clever ploy to convince little ones that bedtime is way more fun than they thought.

Gather your materials.
Materials
- A medium size torch (we used an Eveready Brilliant beam as we found the compact LED torch didn’t work as well as this)
- A tall tube (approx. 30cm) with a clear lid (eg. a Pringles can)
- Our constellations template printed onto 200gsm card
- A push pin or hole punch
- Scissors
- Glue
- Sticky tape
- Materials to decorate your tube
Step 1
Decorate your tube will collage papers. We used contact paper for a nice smooth shiny finish. You will notice we started with a small tube pictured here but soon realised that we needed to extend it to a 30cm tube to create the right throw distance for the light projection.

Decorate your tube.
Step 2
Make a hole in the bottom of the can using a pair of pliers or screwdriver. Make it big enough for the torch to fit in snugly (TIP: this requires help from an adult). Attach your torch to the tube with sticky tape.

Cut a hole for the torch in the end of your tube.

Attach your torch to your tube.
Step 3
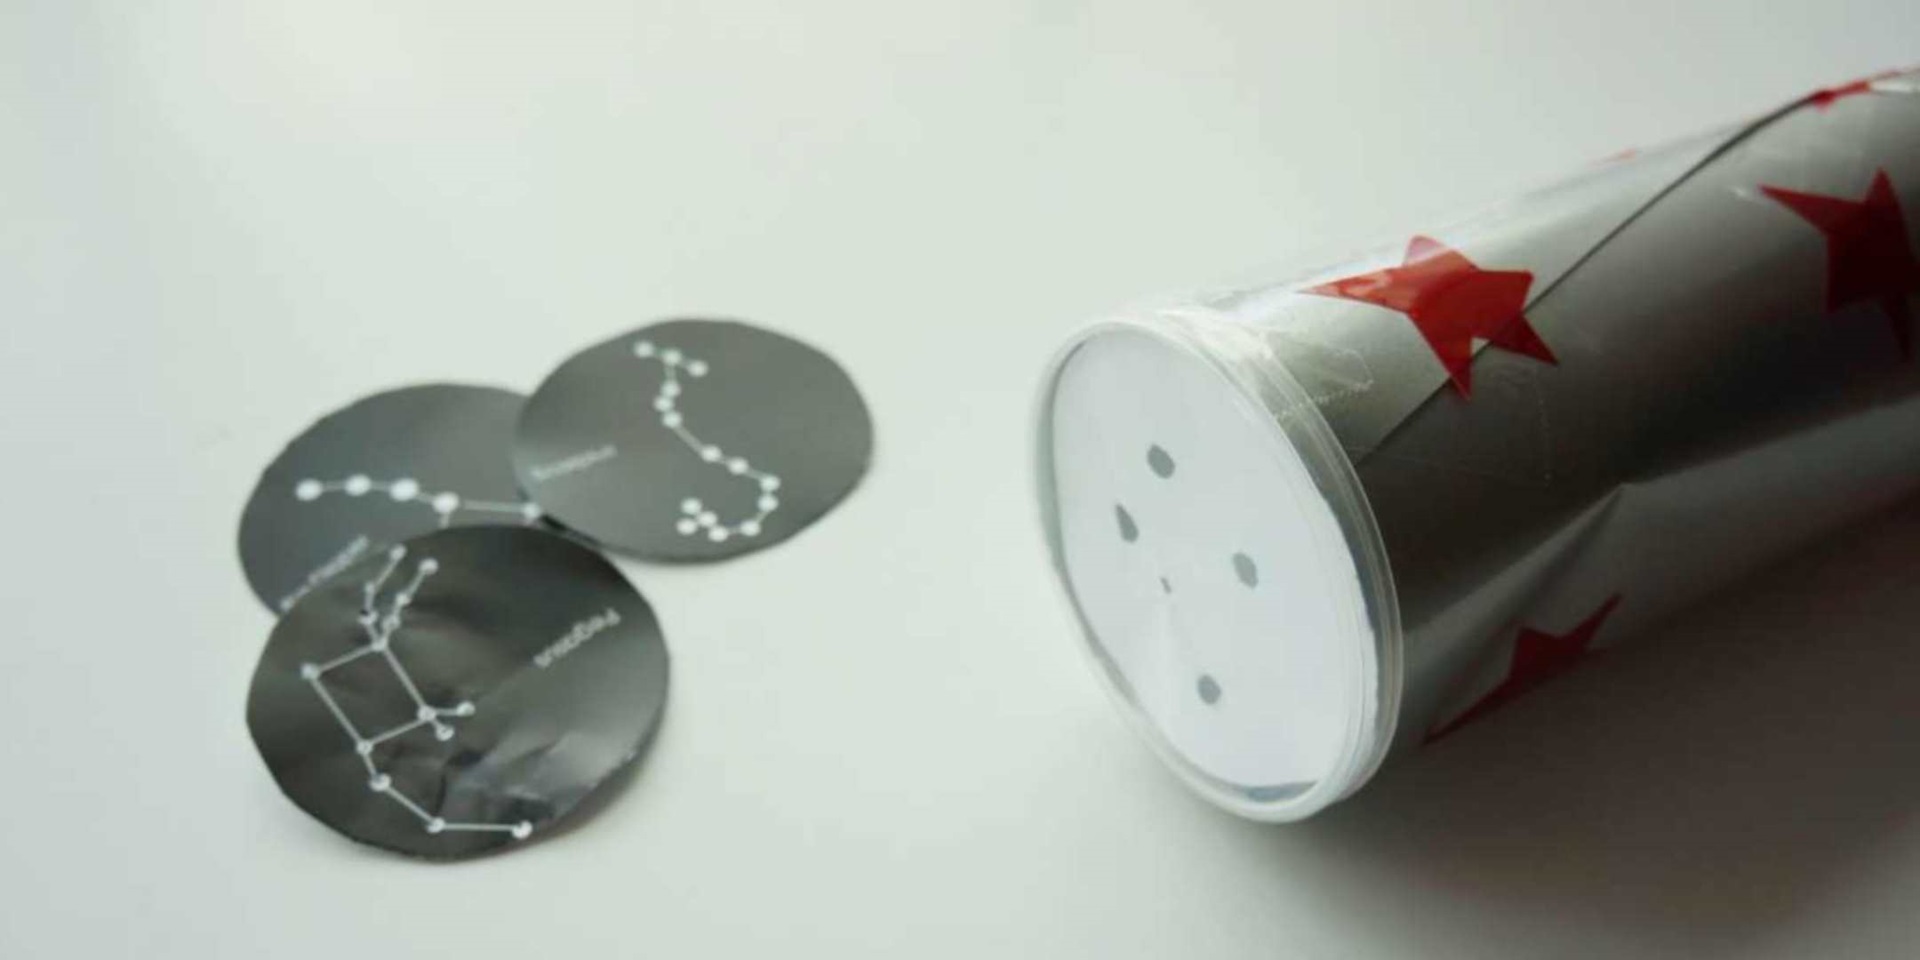
Cut out the constellations template and push out the star dots with a hole punch or push pin.

Cut out the constellations template.

Use a hole punch or pin to make holes in the stars.
Step 4
Now you’re ready to pop your constellations one by one into the clear lid and pop the lid on the tube. You might like a bit of sticky tape to hold it all in place.

Pop your constellations one by one into the clear lid and pop the lid on the tube.
Step 4
Now you’re ready to pop your constellations one by one into the clear lid and pop the lid on the tube. You might like a bit of sticky tape to hold it all in place.
Step 5
It’s time for a star show!


You can project onto walls or fabric in any dark space.
And there you have, your very own, very low-budget, mini planetarium. Time to explore the amazing world of astronomy!
-Annalice Creighton, Public Programs Coordinator
If you like star-gazing, you should join us these school holidays for a 360 degree immersive experience in our pop up planetarium dome.
You can find more great craft ideas on our kids make and do page.