There’s just something about lighthouses that inspires a good story. Those charming beacons, perched atop cliffs, wrapped in red and white stripes, beaming out into the wild and wonderful wide-open sea for all the ships to see.
Shadow puppets are a cinch to make and a whole lot of fun to use. The creative storytelling possibilities are endless. It may be a haunted lighthouse on a lonely hill, an old light keeper on a stormy night, a happy lightship on a merry adventure with his pelican friend or a timeworn tale of sandwich stealing seagulls.

A humble bit of cardboard perched atop a popsicle stick and illuminated by torchlight is just enough to turn bedtime stories into their favourite time of day.
We’ve taken inspiration for our shadow puppets from a favourite vintage story – Blinky the Lighthouse Ship by Ruth Roberts – an adorable tale of a lonely lightship who thinks he doesn’t have any friends, until one day he discovers just how valuable he really is.
There once was a lightship named Blinky
Because he had big yellow shiny eyes
… when other boats passed by he was so happy he bobbed up and down on the waves going…
Blinkety blink
Blinkety blink
But the other ships just went
Hoot
Hoot
And hurried off to sea …


Materials:
- Lighthouse story puppet A4 templates (Page 1 Page 2 Page 3)
- Heavyweight cardboard (alternatively you could use lightweight paper and laminate it first — this would also help with durability of your puppets)
- Scissors
- A craft knife for fine cuts
- A4 cutting mat (or some scrap cardboard)
- Coffee Stirrers (regular pop sticks are also okay, but stirrers are nice and long for easy puppet manoeuvring)
- 3 paper fasteners or bradleys
- Sticky tape
- A pencil
- Some string
For your puppet performance later:
- A light-coloured sheet or shadow puppet frame (a large canvas frame without the canvas and with a bit of lightweight cotton or lining fabric stapled on it is great)
- A torch
- Some imagination
Optional:
- Cellophane
- Crayons or markers to decorate

Step 1
Trace your templates onto the heavyweight cardboard.

Step 2
Cut out your puppet templates on the cutting mat starting with the fine details first.
TIP: A grown up will need to make these finer cuts using the craft knife.
It’s best to start with the finer cuts — like the windows, stripes and eyes — before you cut the shapes out completely because these cuts will become more difficult to make (and more likely you will slip and make a mistake) once the shape is smaller and more delicate.

Step 3
Once your delicate features have been cut out you can cut out the shape outlines using scissors or your craft knife. You may wish to choose the simpler shapes like clouds for little hands to help with.
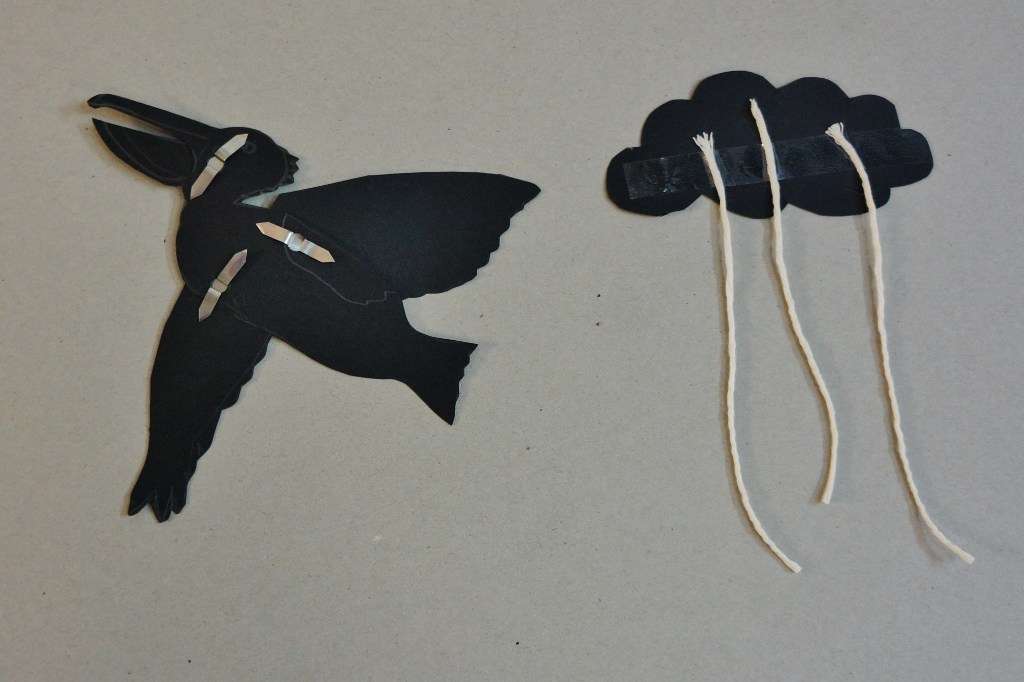

Step 4
To finish your raindrop cloud, thread the rain onto string and sticky tape onto the back of the cloud. To assemble the Pelican, use a paper fastener to secure the jaws and wings lightly so that they are moveable.

Step 5
Add your stirrer sticks to the back of each shape with a good amount of sticky tape. You could also add some craft glue behind the stick for extra sturdiness.


Step 6
If you want to add an extra bit of flourish, sticky tape on some cellophane — yellow for the light, blue for waves, and colour or decorate your shadow puppets as you wish.
And that’s all there is to it!
Blinkety blink, blinkety blink. Grab the torch, it’s story time!
")
")
Download a transcript of Blinky the Lighthouse ship story here.