

Painting of South Georgia by Bernard Ollis, 2014.
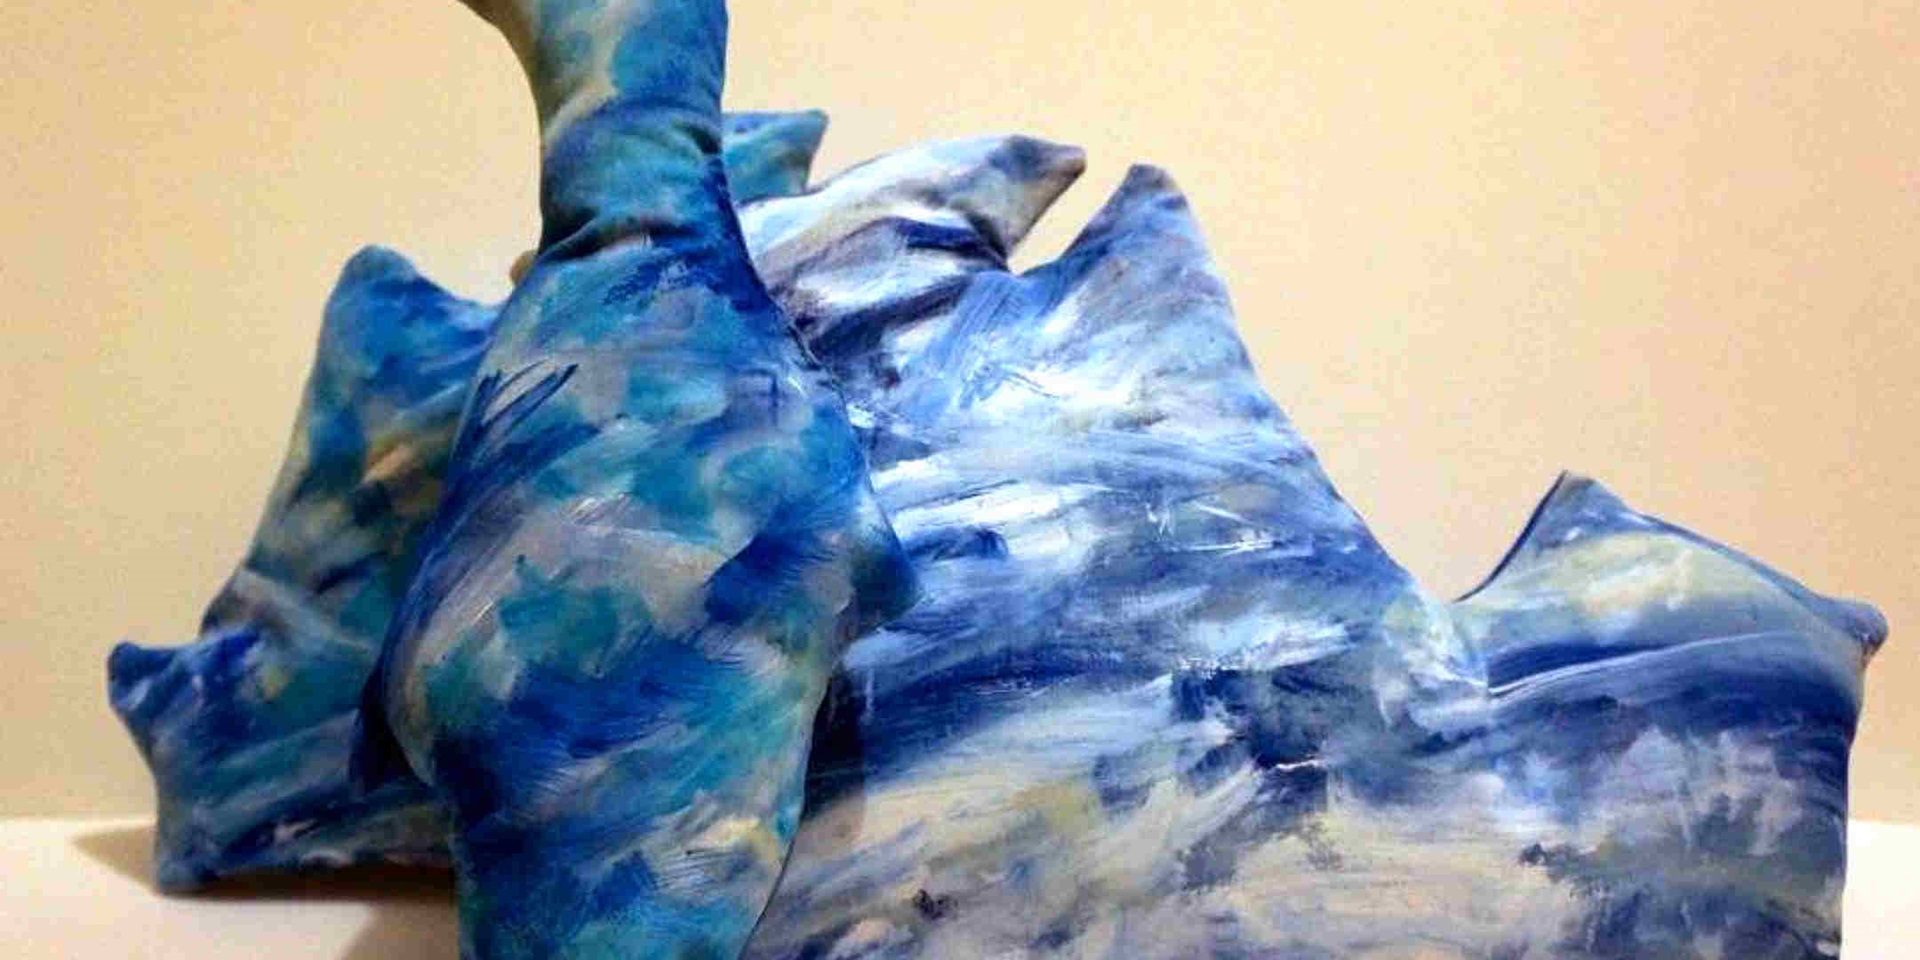
Down in Antarctica there are penguins, bergs and impasto blue skies; ice white shores, swirling winds and wondrous wilderness. This month we’ve been inspired by the sublime land and seascapes of the polar south to create some painted polar pillow crafts of our very own.

Materials:
- 2 metres of light-coloured pre-washed cotton fabric (old sheets work well)
- Fabric paints in blue and white (we used Permaset Aqua inks in white, junior navy and glow blue)
- Brushes and sponges for painting
- A water container
- Scissors
- Polyfill stuffing
- White/blue thread
- An iron
- Dressmakers pins
- A sewing needle
- A sewing machine (optional)
- A4 Penguin and iceberg pattern templates – Penguin Part 1, Part 2, Iceberg Small Part1, Part 2, Iceberg Large Part 1, Part 2, Part 3


Step 1: Cut out your templates and trace them onto your fabric.
Step 2: Cut out your penguin and iceberg fabrics.

Step 3: Dampen the fabric shapes all over with some water and a sponge. This will help our paints spread easily.

Step 4: Time to paint! This design is lots of fun because you can just swish the brush with your fabric paint back and forth and be as messy as you like and it still looks great. You might like to experiment with different types of brushes and textures. Don’t forget to wear your apron and roll up your sleeves through—fabric paint doesn’t come out of clothes easily. Start painting with the darkest tone and add lighter blues and white tones next. Ensure you don’t lay the paint too thickly.

Step 5: Once finished your painting, lay out all the pieces to dry. They should take about 2 hours to dry completely.

Step 6: Iron your pillow pieces for 15-30 seconds to heat-set your paints.

Step 7: Place your pillow pieces with the painted sides facing in and use dressmakers pins to pin the seams. Remember to leave a 3-4 centimetre gap at the bottom to allow you to turn the pillow the right way out and add the stuffing.

Step 8: Sew your pillow pieces together by hand or with a sewing machine.

Step 9: Add some polyfill stuffing to your pillows, being sure to stuff right into all the corners.


Step 10: Once your pillows are stuffed, close off the opening with a running stitch.

Now it’s time to nestle between the icebergs, hug a penguin, lie back and dream of Antarctica!