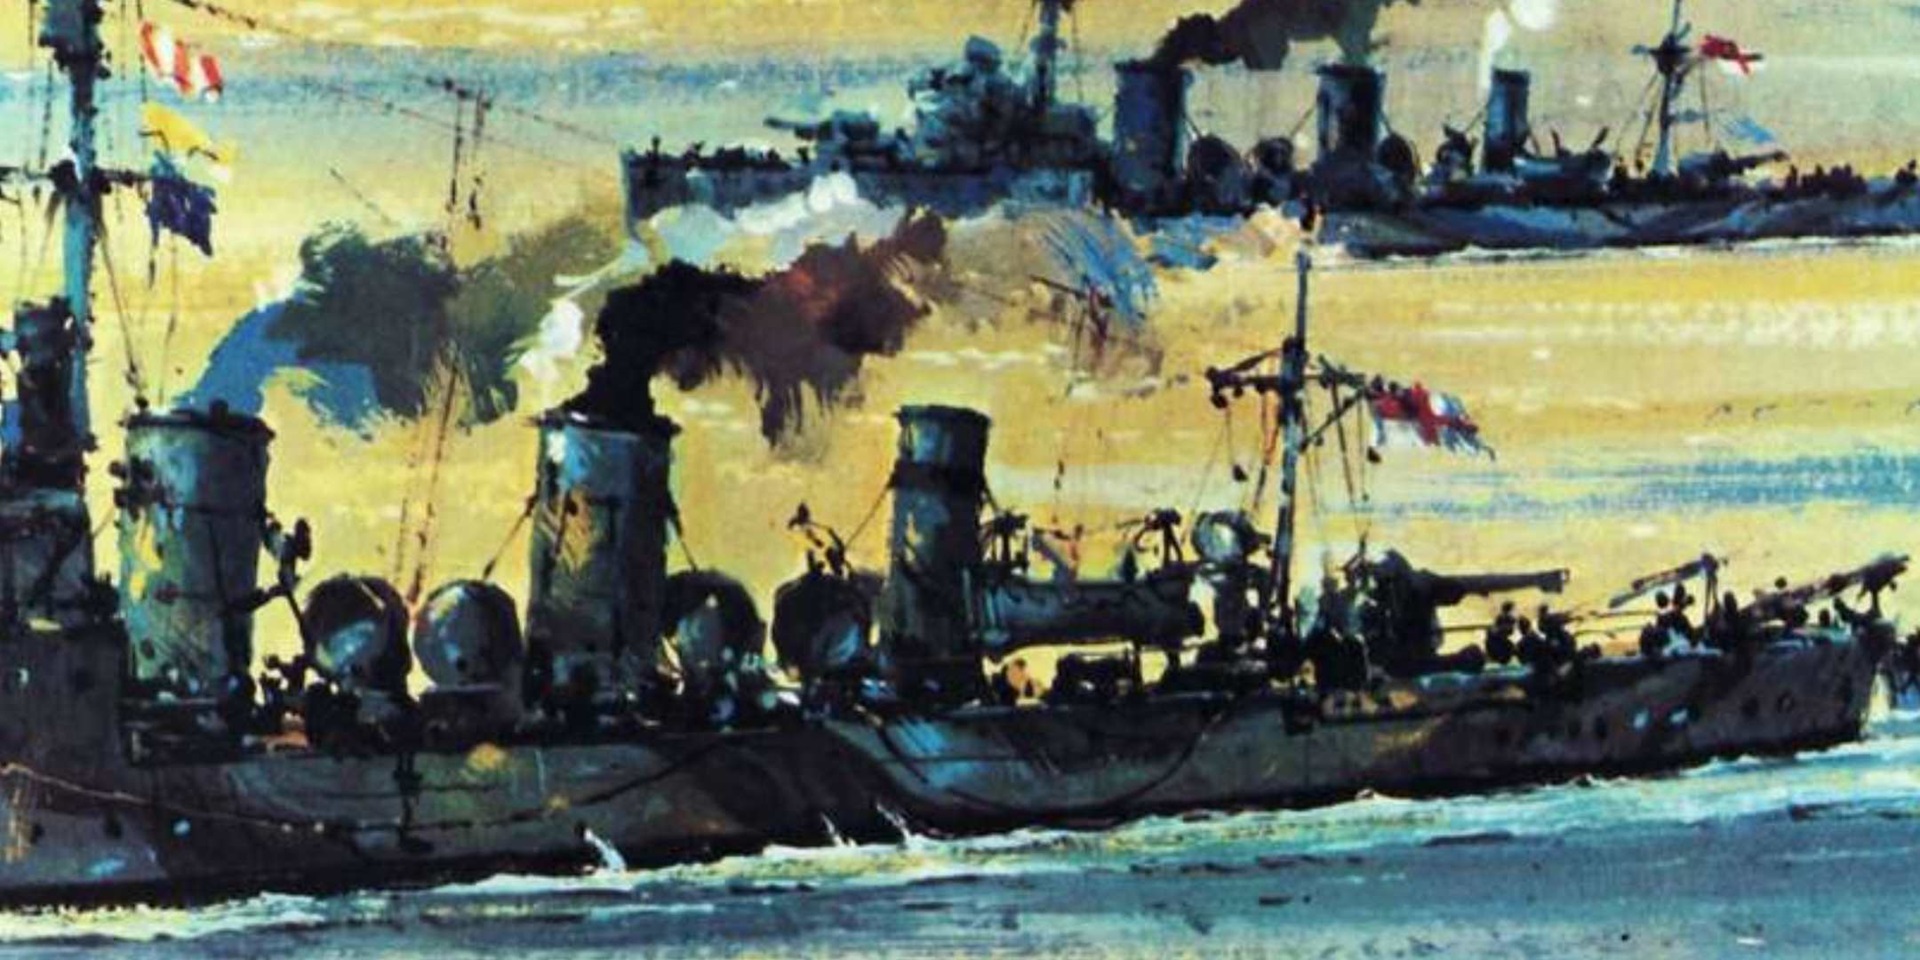

This 1973 dinner menu from the P&O liner SS Oronsay was part of a series of paintings of famous sea battles by John Smith. This image depicts the Battle of the Dardanelles, 18 March 1915. ANMM Collection Gift from William Brennan
On 18 March 2015, Turkey will commemorate the 100th anniversary of a victory over Allied forces just prior to the Gallipoli land campaign on 25 April 1915. The defeat of an Allied fleet attempting to force the Dardanelles Strait is a little-known story in the tale of the Anzacs, but one that changed the whole nature of the ill-fated campaign.
From late 1914, as the war on the Western Front was becoming a stalemate of trench warfare, First Lord of the British Admiralty Winston Churchill began to advocate a decisive use of British naval power in an action on the edges of Europe, as an alternative to pouring more and more resources into northeastern France.
Churchill felt that a relatively small investment of a squadron of Allied warships might force the forts and minefields of the Dardanelles, deploy off Constantinople (Istanbul) and compel the Turkish Ottoman Empire to sue for peace — opening up a supply route to Russia and relieving the British in Egypt. He had in mind a number of older pre-dreadnought battleships not tied up watching the German Navy in the North Sea.
With some Churchillian persuasion of the British cabinet and support from Vice Admiral Carden, from January 1915 preparations commenced with the battlecruiser Inflexible joining the newly commissioned Queen Elizabeth, the Royal Navy’s first dreadnought with 15-inch guns. In February, British marines occupied the Greek island of Lemnos, with Mudros Bay — a place soon to be familiar across Australia — becoming a forward base for the campaign.

HMS Queen Elizabeth at Mudros Bay, Lemnos. Australian War Memorial Collection
The idea that the defences of the Dardanelles could be cowed by naval forces alone was in fact quite naive. By the time a British and French fleet had been assembled the Turks had developed their defences into a coordinated system of forts with big guns, rows of underwater mines and concealed batteries of mobile howitzers and field guns — all within a network of powerful searchlights.
The plan of attack produced by Admiral Carden was, as historian Peter Hart suggests, ‘little more than a list of the defences to be overcome in turn’ and ‘next to useless’. The Allied naval guns could only elevate to 20 degrees and this relatively flat trajectory was ineffective against low-lying forts on the hills around the straits.
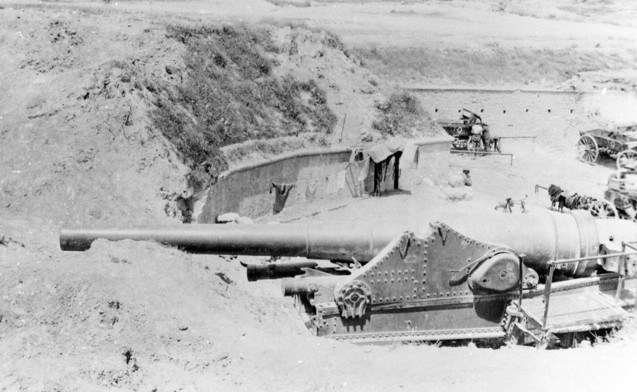
Destroyed Turkish gun from the outer forts. Australian War Memorial Collection
After a period of bad weather on 25 February the Allied fleet pressed the attack. The outer forts were duly taken after marines and sailors were landed at the forts of Sedd el Bahr and Kum Kale to complete destruction of their guns. Now the strait entrance was open for a distance of around 12 kilometres to the next set of defences — underwater minefields with mobile artillery batteries supporting them, and another set of large forts.
The minesweepers for this task were cobbled together from converted fishing trawlers and civilian crews. Now the Turkish mobile howitzers came into their own and they found the minesweepers to be easy targets. Even the warships brought up in support were threatened as they only had side armour and no protection from high-angle artillery. As one British sailor recounted:
The ‘beastly things … fire from behind a hill and all you know about them is that shells are falling all around … and it is impossible to hit back’.
Slow progress meant more pressure from Allied Command and a plan was drawn up for a concentrated attack on the Intermediate Defences at the narrows. The stress of this fraught mission was great on Admiral Carden and, perhaps with some prescience, he fell ill and returned to London, replaced by Vice Admiral John de Robeck.

1915 map of the Dardanelles Straits. The added red lines show the mines known to the Allies. The hatched red line of mines was unknown. ANMM Collection
With 14 pre-dreadnoughts, the battlecruiser Inflexible and the mighty Queen Elizabeth, Robeck launched a grand attack on 18 March. The plan was for three lines of ships to attack in waves — the longer-range, more modern ships first, then the older vessels were to move through and continue to press the bombardment of the forts at closer ranges. With the forts suppressed the minesweepers would clear the way for the process to begin again at the final major series of defences at the narrows at Chanak.
However the Turks had skilfully lain an unobserved line of mines at right angles to what would be expected of a vessel’s path through the straits. This seemingly innocuous development was critical. The Turks had noticed the Allied battleships needed to manoeuvre in this slightly wider section of the strait. The positioning of mines parallel to the shoreline, rather than straight in the path of attacking ships, was a stroke of genius.
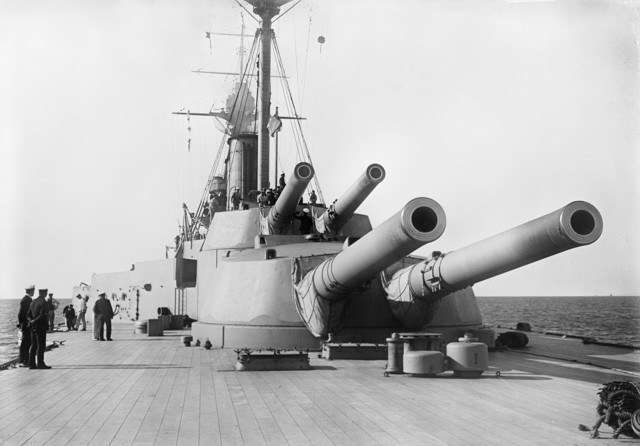
The powerful 15-inch guns of HMS Queen Elizabeth. Australian War Memorial Collection
On what was a clear sunny morning of 18 March 1915, the Allied fleet steamed into the straits. The first line of indomitable-sounding ships — Queen Elizabeth, Agamemnon, Lord Nelson, Inflexible, Prince George and Triumph — began to pound the Turkish forts with their heavy guns. By midday, the bombardment seemed to be succeeding and the forts’ guns were only weakly replying. At 12.06pm de Robeck ordered the second line to pass through and close the range.
But as the French ships Gaulois, Charlemagne, Suffren and Bouvet moved through, the Turkish fire commenced in earnest. Almost at once the French flagship Suffren was hit by a shell that penetrated a magazine and only the quick flooding of the area saved the ship. The Bouvet was hit by a shell and then ran onto a mine. The vessel quickly heeled over, then lay keel uppermost for a moment before sinking in about three minutes — with 638 crew killed.
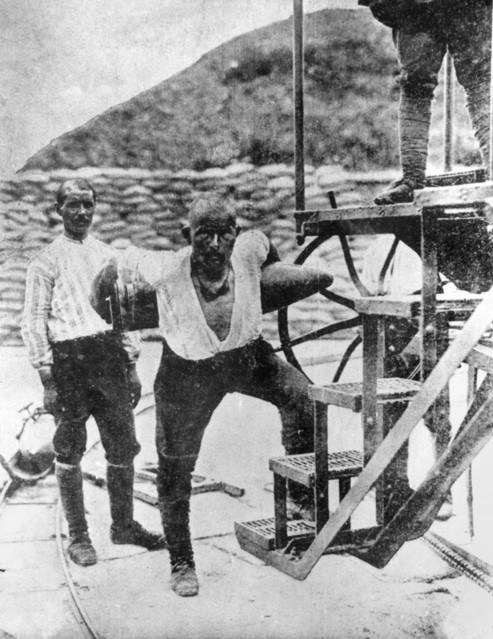
Turkish artilleryman Corporal Seyit Onbasi is famous for having carried three 275 kg shells to an artillery gun during the Allied attempt to force the Dardanelles on 18 March 1915. During the naval bombardment the gun he was serving in the Mecidiye fort remained operational but its shell crane had been damaged. Seyit carried three heavy artillery shells up to the gun enabling it to continue firing on the Allied fleet. One of the shells reputedly hit HMS Ocean, although the ship was later sunk by a mine. Following the repulse of the naval assault, Seyit was promoted to corporal and became a national hero. A statue of him carrying a shell was erected in 1992, just south of Kilitbahir Castle on the Gallipoli Peninsula. This photograph was taken after the event and recreated for the camera. Australian War Memorial Collection
But in the chaos of shellfire the two explosions in the Bouvet did not reveal that the ships on the right flank were heading toward a minefield that had not been discovered by the Allied observation aircraft. At 4.11pm Inflexible struck a mine and was forced to retreat. Just after, Irresistible also detonated a mine and began to sink under heavy fire.
Still unaware of the line of mines, and assuming mines had been floated down, de Robeck ordered the lead ships back and then a general recall at 5.50pm. As Ocean was circling around, it too struck a mine and while most of the crew were rescued, it was finally abandoned to sink at 7.30pm.
Three Allied capital ships had been sunk and three more severely damaged — a third of the main force. While Commodore Keyes claimed the Turks were on the brink of defeat and running low on ammunition, as Peter Hart suggests, this was a ‘classic example of hope masquerading as fact’. The forts were still intact, there was sufficient ammunition to face a renewed attack and the main minefields in the narrows had not been reached.
At the outset of the campaign it had been thought that the Allied troops gathered in the Mediterranean — including the Anzacs — would be marching in to occupy a crumbling Turkish nation, already submitting to the Allied fleet. But the Allied focus soon turned to an amphibious assault that would be the tragedy of the Gallipoli Campaign. The Turks celebrated a great victory against the navies of two major world powers, and bought even more time to strengthen their defences of the Dardanelles.
The victory over the Allies is celebrated on 18 March as Çanakkale Zaferi (Çanakkale Victory) every year, with tens of thousands of Turks attending the events on the battlefields and memorials across the straits and Gallipoli peninsula.
– Stephen Gapps, Curator
The Australian National Maritime Museum’s exhibition War at Sea: The Navy in WWI runs until 3 May 2015.
Further reading:
Peter Hart, ‘The day it all went wrong. The naval assault before the Gallipoli landings’ Wartime, Number 62, pp. 8-13.
Lawrence Sondhaus, The Great War at Sea – A Naval History of the First World War, Cambridge University Press, 2014.