
What’s in the box?
A warrior’s sword, a dragon’s treasure, a great castle, a fearsome sea serpent, a beautiful crown…and a million other wonderful things…all you need is cardboard plus a little bit of imagination.
In case you also were wondering what to do with all those boxes left behind after the festive season’s gift giving, this month’s craft spot is inspired by cardboard boxes and Viking adventures!
Surely you have attempted the cardboard box car before…well here we have a how to on box-board viking armour and a wearable longship! Your little raiders and pillagers can wield their fearsome (but non-injury-causing and recyclable) armour while sailing the high seas in this swashbuckling creation. Cardboard box craft is always terrific fun and as a bonus these props will inspire hours of imaginative play- perfect for keeping them amused this school holidays.
Materials
- Scissors and a Stanley knife ( for grown up use only)
- Makedo cardboard box cutters ( excellent for safe cutting for kids)
- Brown cardboard boxes of various sizes ( if you are doing a ship you will need a big-ish one) If you can get some recycled pulp cardboard boxes these are the easiest for kids to cut
- Coloured contact/ vinyl or coloured cloth tape for decorating and sticking together
- Masking tape
- Large paper fasteners ( we used 51mm celco paper binders, if you have a makedo kit, the blue box binders will be just as effective and safer for kids to handle)
- Rope or string for straps

Step 1- Making the props
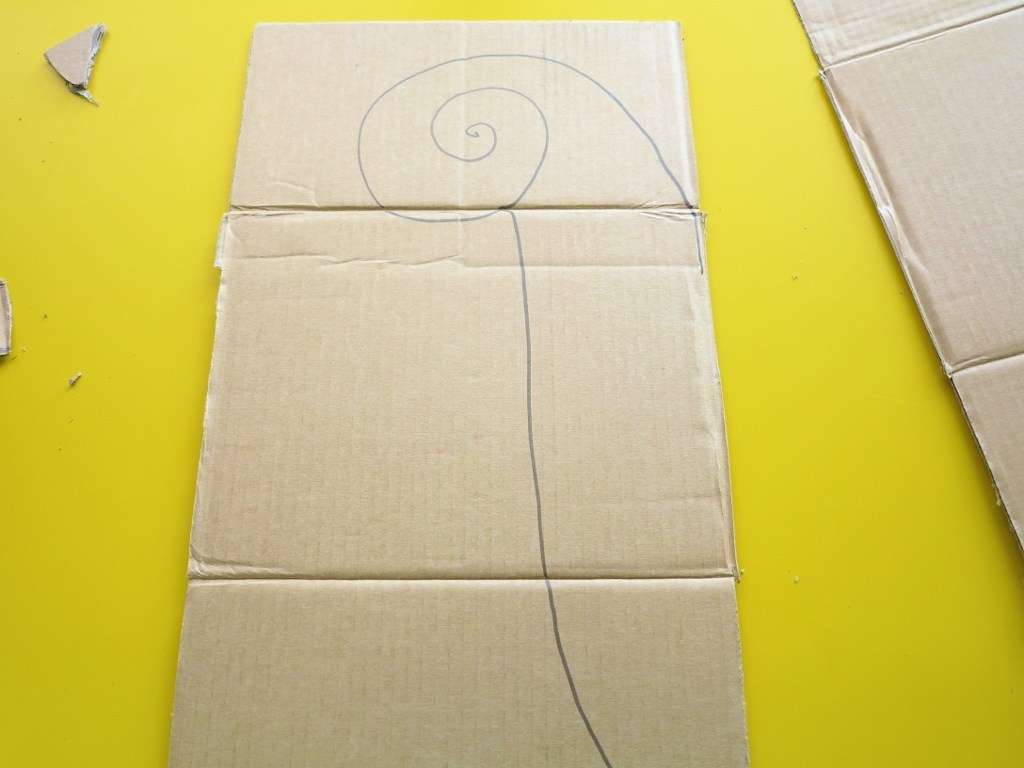
Draw a sword, shield and strap, and an axe onto your cardboard.
You might like to make two copies of the axe and sword so you can double layer the cardboard for stability of your prop.
Now for the trickiest shape- the helmet, draw the nosepiece roughly centred along the bottom line and a few inches above that place 3 petal type shapes- centred around the nose-piece which we will fold in to make a domed helmet. Leave the helmet band extra long on one side so it can wrap all the way around the head.


Step 2- Cutting
Cut out your props with a Stanley knife (grown ups only) or scissors.
Stick together the two layered axe and sword and stick the handle on your shield.


Bend the surface of the helmet to make it flexible. Fold in the petals to create a half dome and stick together from the inside.

Bend the cardboard on and around the helmet band and petal shapes to make it flexible.

Step 3- Decorate!
Decorate your props. We have used just a bit of sparkly contact for the silver parts ( blades and bands) and two colours for our shield. You might like to try different designs.
To get a precise cut out of contact lay the prop on top of the contact and trace the blade shape before cutting out. Alternatively you can estimate a square or rectangle larger than the area you need, stick it on and trim off the excess. The second method will be easiest for circular shapes. For our helmet we also added some of the paper fasteners as decorative studs.


Step 4- Start your longship
With your armour all ready for adventure it’s time to get the longship in action.
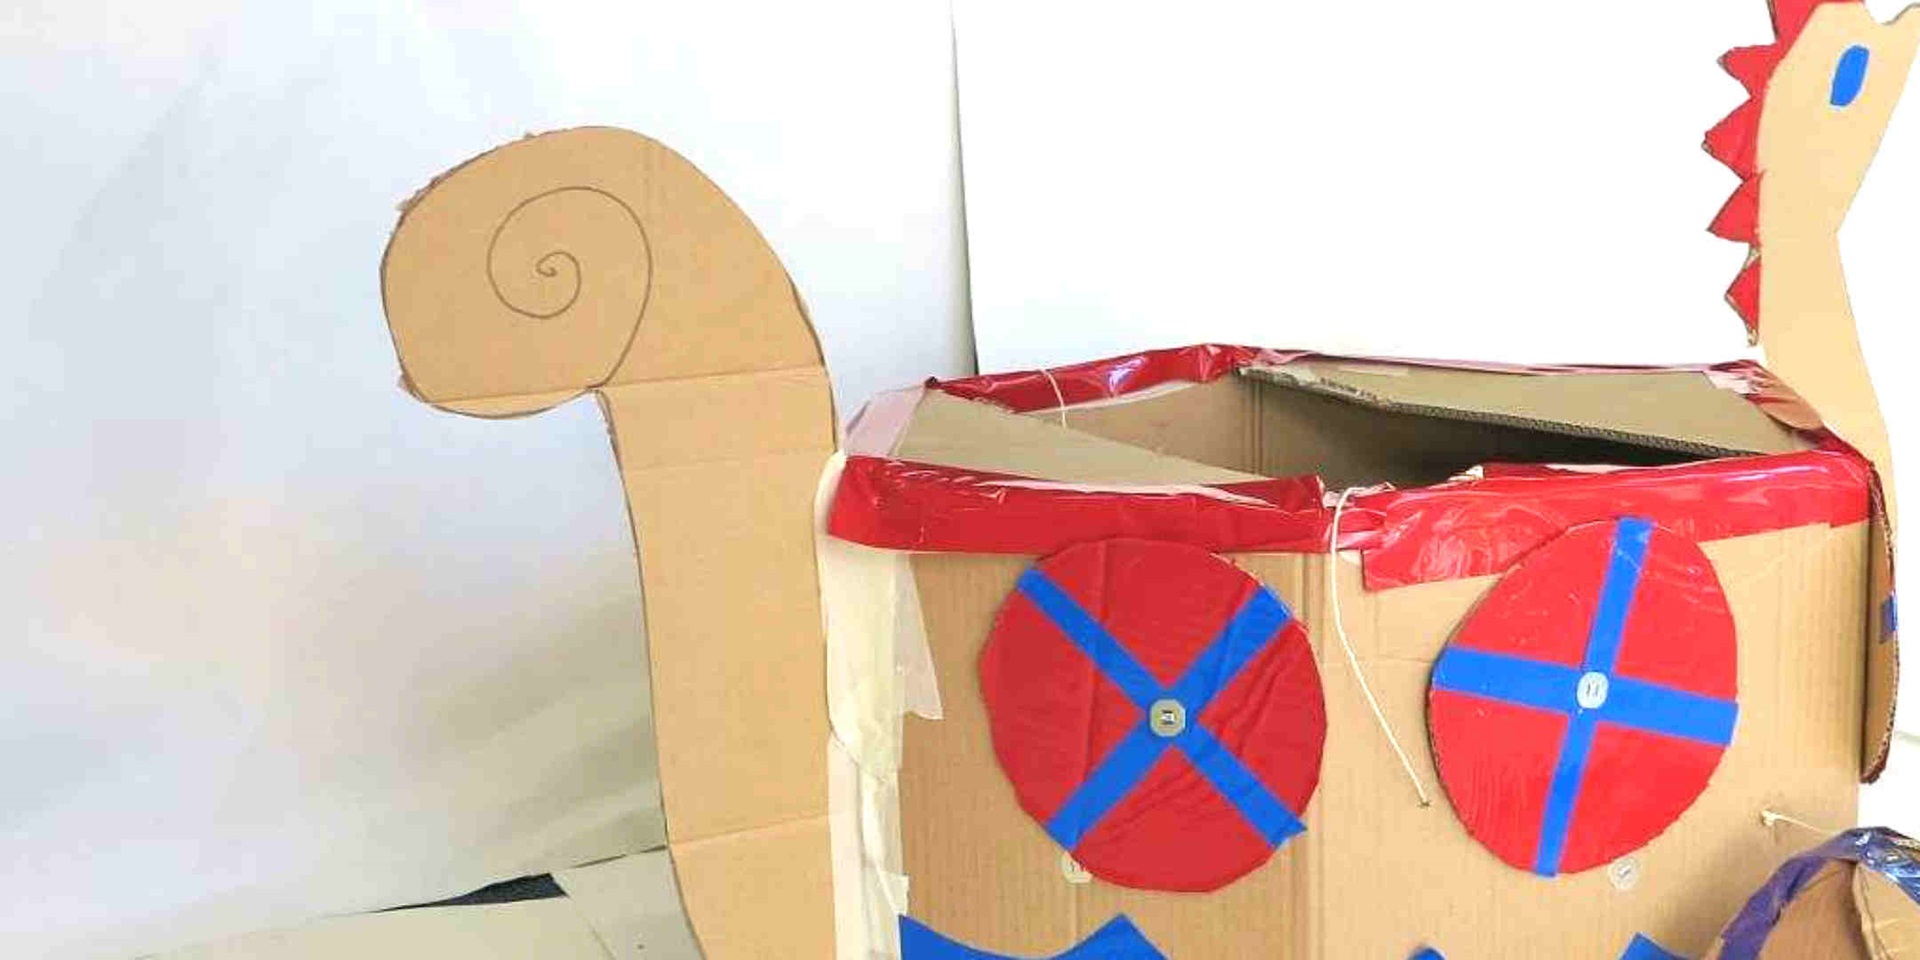
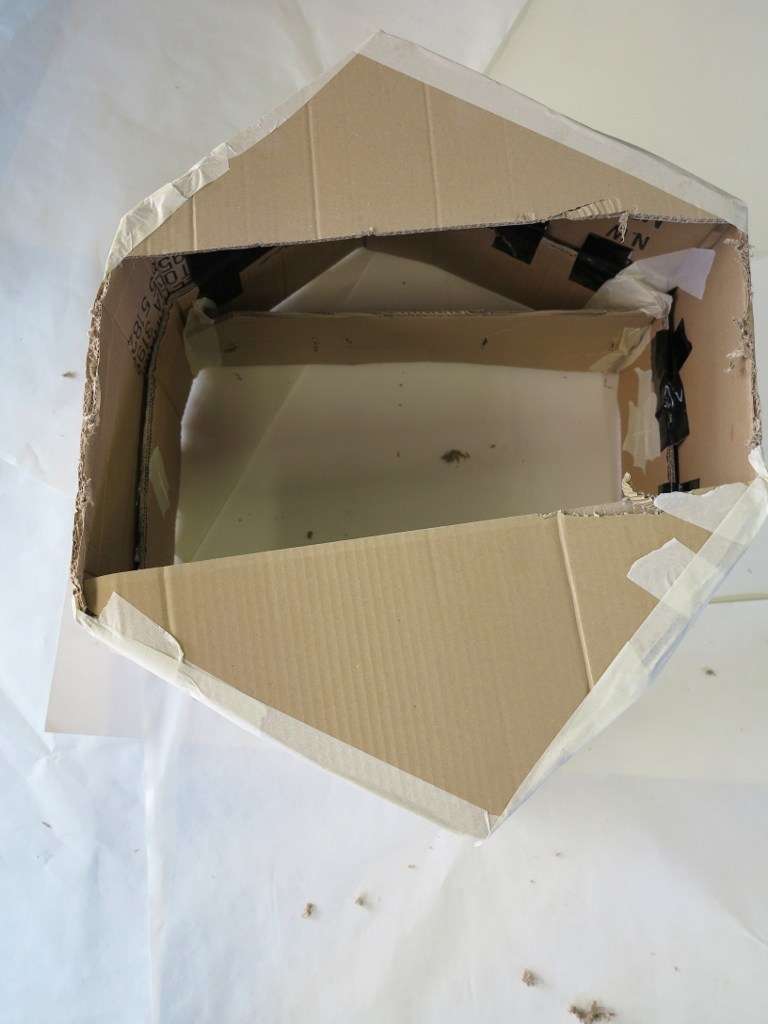
Take your largest cardboard box and bend it to create a hexagon.

Step 5
Cut off the top box flaps and keep them for later.
Fold under the bottom flaps and secure with cloth tape or paper fasteners. If you use paper fasteners you might like to tape down the metal ends on the inside of your boat as they can be scratchy and sharp.


Step 6
Cut two more pieces of card to fit the width across the top and bottom of your hexagon. This will divide the inside of your box into two triangles and a square. Slot these pieces of card inside as shape supports. Tape them to secure in place.


Step 7
Cut two triangles to tape to the top front and back ( or bow and stern if you want to get technical) of your longship.
Step 8
Draw and cut a figurehead and tail for your longship. We made ours the classic midgard serpent Jormungand. Tape these onto your longship also.


Step 9
Now for the straps. Use the end of your makedo box cutter knife or a paper fastener to pierce 2 holes for the straps to go through on both sides of the ship body. Holes should be a third of the way up the “square” part of your ships body, one towards the front and one towards the back on either side.

Pierce a hole for the strap to go through

Tie a knot so the strap stays in place
Step 10
Weave the string through the front holes and tie a few knots on one end to stop strings from going back through the hole. Lace the string across on a diagonal to the other side of the boat and back through the back hole on that side ( creating a cross strap). Tie off firmly but you might like to leave a looped knot so you can adjust the strap size later.

Create a cross- strap for greater stability of your wearable longship
Step 11- Decorate!
Time to decorate again! Cut contact shapes to suit your design! You might like to add some contact waves along the bottom or a few decorative shields along the side secured with paper fasteners.

Add decorative elements to your longship like shields , waves and stripes

Now put on your props and jump inside the longship… It’s time to go a- viking!