Raiders, traders and crafty-art-makers, this month our craft spot is inspired by Vikings. Get ready for some sudsy, sloppy, slimy fun as we give a nod to Viking age textiles with this whimsical wet-felted rug!
Felt-like material has been found in Viking age archaeological sites and was likely worn by the people we now know as the Vikings. Wet felting is fantastically messy but a really fun craft activity for with children. Best of all you can customise your felt rug with fabric scraps, cut-outs, threads or ribbon trapped between the layers to make a unique artwork or a themed play mat. Have a play and don’t be afraid to experiment with different colours and textures in your felt.

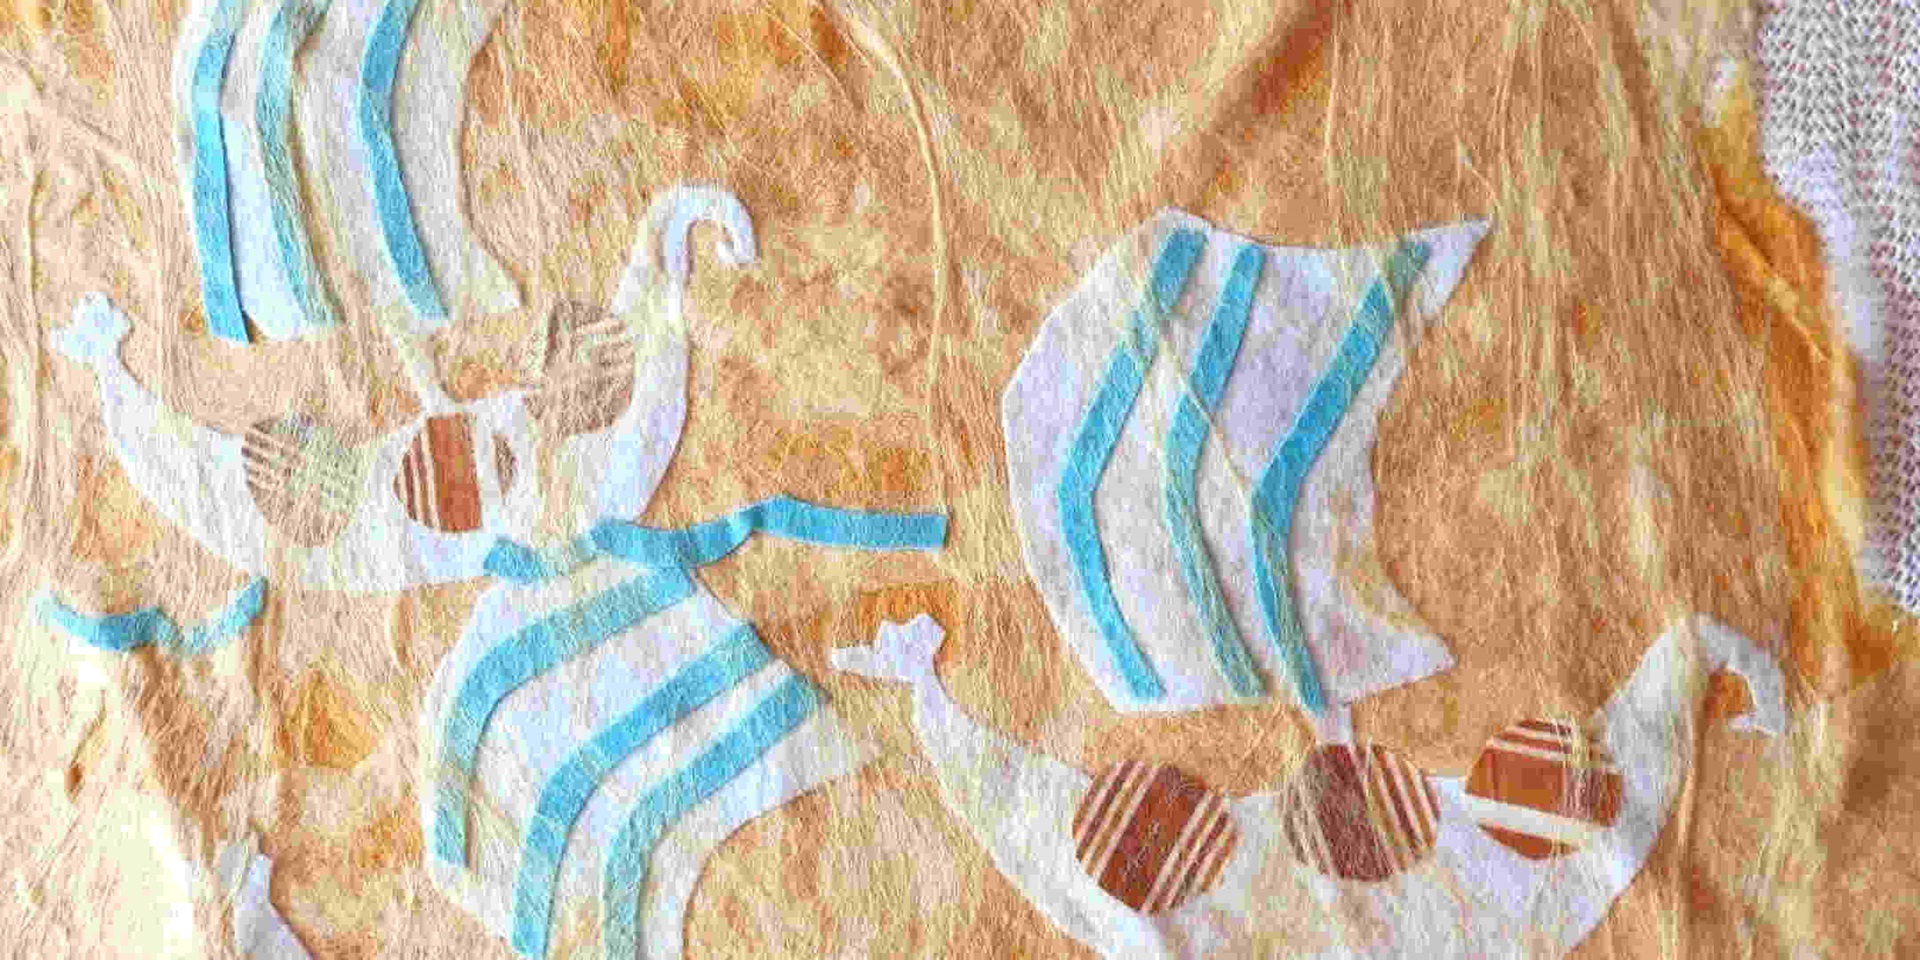
A Viking longship felted rug in the making- learn to create your own with the instructions below
Materials
- 1 or two heads of wool roving in different shades/ colours if you can (available from places like Virginia Farm Woolworks)
- Dishwashing detergent or soap flakes
- A large bamboo sushi mat/ bamboo blind or bubble wrap or PVC grip mat
- A few towels
- A spray dispenser with hot water
- Some scrap fabric/ threads or cut-outs.
- A pair of scissors

Materials for your felted rug
Step 1
Prepare and plan your decorative scene for the rug, if you are adding cut-outs as we are, prepare these first. We chose to make 3 Viking longships with shield details from scraps of pre-made felt and fabric. Ours were cut free-hand but if you would like a guide for your shape just find a nice clear outline /silhouette image online and trace around it onto your cloth before cutting.

Decorative shapes to create a scene in our felted rug

Decorative shapes to create a scene in our felted rug
Step 2
Lay down your mat (the bamboo mat or bubble wrap- bubble side up or PVC grip liner) first. Make sure it is big enough for the size of rug you are making.
On top of this lay your wool roving to the size you require.
Gently separate out the strands of roving with your fingers. You need to layer your roving in different directions- horizontal then vertical then horizontal etc. We started with 3 layers.

Laying down the first layer of roving onto our mat in a horizontal direction

All three layers of wool roving ready to be felted
Step 3
Spray the surface with hot or warm water all over and a small about of detergent or soap flakes drizzled on top. You can combine the soap flakes or detergent into the water spray for convenience if you like. Gently press down the wet surface with a spare piece of your mat fabric.

Spraying the surface of the wool with hot water

Adding some detergent or soap flakes to the wet wool
Step 4
Now the wool is hot and soapy it is ready for friction to be applied so that the open fibres will bind together. Roll up your mat on top of the felt layers and give it a good rub back and forth for a few minutes. You may even like to turn the felt over and spray and roll from the other side as well.

Pressing down the hot soapy wool with some of the mat

Rolling the mat back and forth to bind together the fibres into felted fabric
Step 5
Now it is starting to look a bit flatter and evenly wet, add your decorations to the top layer. Lay over these another layer or two of the lighter coloured roving. Remember our next layer of roving is horizontal, then vertical and so on. We have laid ours very thin so as to avoid obscuring the scene but if you are doing more of an abstract thread decoration this will not matter as much and more than one layer on top will ensure your decoration is more securely embedded.

Adding in our decorative elements and another layer or two of roving
Step 6
Repeat as before with some hot soapy water sprayed on, press down with your mat and then proceed to roll. TIP: The bamboo mat is not the most ideal for this stage as it can distort the surface of your design and pull at any small threads so if you can use bubble wrap or grip mat that will be helpful. Keep rolling and rubbing (this can take a while) until your wool is looking much thinner and flatter. Give the surface a pinch test to see if it is all well bound together.

Pressing down the hot and soapy wool fibres before rolling again

Rolling back and forth to bind the fibres into felted fabric. Be gentle on decorative surfaces. Pinch the surface to test if it is properly felted, no fibres should pull up if it is well done.
Step 7
Once you are happy with the texture of your felt rug, rinse it out with water and use the towels to squeeze out excess moisture.

Washing out our completed felted rug. It will take quite a bit of water to wash out all the suds.
Step 8
Hang your rug out to dry.

Squeeze out excess moisture and hang to dry.
And there you have it. A felted Viking longship rug perfect for play, stories or just for decoration!