Ahoy there landlubbers, scurvydogs and sprogs! Our craft spot this ere month be dedicated to puttin a swashbucklin pirate print on everythin!
A tote, bandanna or flag as well, this ere creative caper be an excellent activity for celebratin pirates any time.
If ye be without the doubloons to get ye a scurvy silkscreen, ye can use a simple sponge roller for your pirate print instead.

Materials
To make a Stencil

- Ezi-cut stencil paper or a glossy piece of cardboard (we used a cardboard poster)
- A craft knife
- Pencil
- Cutting mat or piece of thick cardboard to protect the table
- A window or a lightbox
- A simple pirate design printed to A5 size (we used our Pirates Family day graphic)
To print onto

materials to print onto: a calico tote bag, a bandanna, PVA glue, chopsticks and scrap fabric for a flag
- A calico tote bag
- A fabric bandanna
- A flag (small rectangle of scrap fabric, PVA glue and a chopstick)
- Or anything you like really…
To print with

Materials to print with- fabric paint, masking tape, sponge roller and paint tray or silscreen and squeegee
- Silkscreen
- Squeegee
OR
- Paint tray
- Sponge Roller
AND
- Scraps of cardboard
- Masking tape
- Fabric printing inks (proper inks like Permaset are essential for silkscreen printing. Any fabric paint is fine for roller prints. We used fluoro red permaset ink for both)
- An apron and a hand wipe (for when things get messy)
Step 1
Place your stencil paper over your pirate graphic print out on top of a lightbox or a window. Trace your design onto the stencil paper.
TIP: Choose a simple pirate design that will work well in a single colour print (like our picture does). Avoid anything with lots of small fine lines. The easiest types to cut out will be silhouette or vector graphics.

Step One- trace the design onto the stencil paper
Step 2
TIP: These next two steps need a grown up to help.
Check your design is okay to cut out. Shade in all the areas where you are cutting out the paper to make the stencil. If there are any free floating shapes (like a circle within a circle) add a little tab so they can be anchored onto the background stencil paper.

Step Two: check your image is ready to cut
Step 3
Cut out your stencil with a craft knife. Make sure you place your design on top of a piece of cardboard or a cutting mat so you don’t scratch the table.

Step 3: Cut out your stencil with a craft knife
Step 4
To screen print: (if you are roller printing skip to Step 8)
Place the stencil on the flat side of the silkscreen frame and tape down with masking tape. Turn it over to lay the screen flat side down on top of your bag/ flag fabric or bandanna

Step 4: tape your stencil to the screen

Step 4: Lay the screen on top of your fabric flat-side down
Step 5
Dab some fabric printing ink at the top and bottom of the design on the screen.
Hold down one corner of the screen firmly with one hand. With your other hand drag your squeegee at a 45 degree angle down the screen and up again. You should be able to see the fabric paint has gone through the screen evenly to cover the design. If not, squeegee one or two more times at most. If you have a helper they can hold down the screen while you use two hands for the squeegee
TIP: sleeves rolled up and aprons on! This is where it gets messy!

Step 5: Add fabric printing ink to the screen

Step 5: Pull the squeegee down at a 45 degree angle and drag up to the top of the frame at the same angle
Step 6
Remove your screen to reveal your fabulous pirate print.
TIP: when you finish, make sure you wash your screen and squeegee thoroughly before they dry

Step 5: You can see your screen is evenly covered with paint. Time to reveal the print!

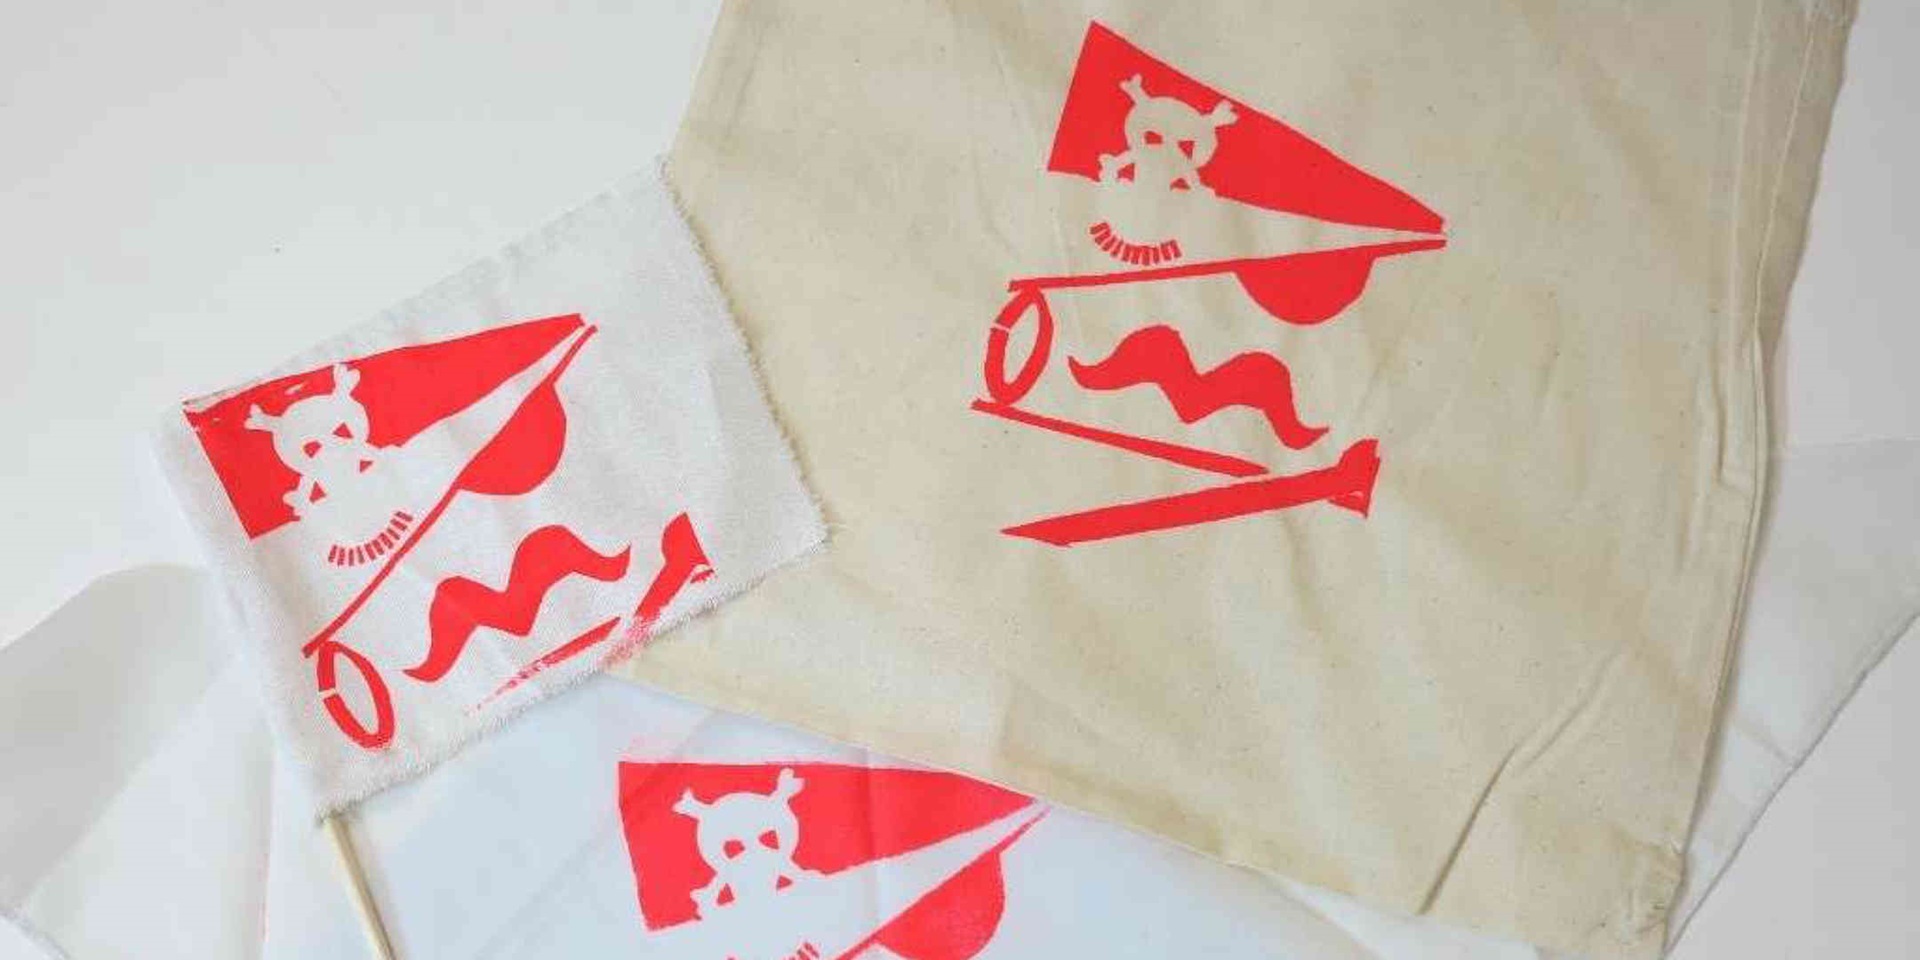
Your print is done! A treasure worthy tote bag!
Step 7
Try the print again on a different piece of fabric. To make the scrap fabric into a pirate flag just paint some pva glue on half the length of a chopstick and wrap the corner of the flag around over the glue.

Step 7: print again. This time to make a flag

Step 7: Add some PVA glue to a chopstick and roll the glue end around the fabric edge to make a flag

Your pirate flag is done!
Step 8
To print with sponge rollers:
Place your stencil down on top of your fabric. Tape in place with masking tape.

Step 8: roller printing onto a bandanna
Step 9
Add some fabric printing ink to your roller and start rolling gently over the stencil. Once it is all covered in paint you can lift off the stencil to reveal your print.

And there you have it, a freebooter’s flag, a bandanna fit for a buccaneer or a treasure tote ready to take home the booty in. Shiver me timbers!